How Can a Solo Female Traveler Stay Safe While Hiking Alone?
Quick Answer
A solo female traveler can stay safer while hiking alone by choosing a suitable, well-marked trail, checking local conditions, sharing her route with someone trustworthy, and carrying emergency supplies. Start with a short daylight hike, stay aware of your surroundings, and turn back whenever conditions feel unsafe. The National Park Service hiking safety guidance is a useful starting point for planning.
Your Essential Solo Hiking Safety Checklist
- Choose your trail: Pick a maintained route that matches your fitness, skills, and available daylight.
- Share your plans: Give a trusted person your trail details, expected return time, and overdue-response plan.
- Pack essentials: Carry water, food, navigation tools, weather protection, first aid, and emergency supplies.
- Stay connected: Charge your phone, download offline maps, and check whether remote communication equipment is needed.
- Watch your surroundings: Stay on marked paths, keep your hearing available, and maintain distance from wildlife.
- Trust warning signs: Change plans if the weather, terrain, another person’s behavior, or your physical condition raises concerns.
Before Leaving the Trailhead
- Confirm your exit plan: Know where the trail ends, how you’ll return to your accommodation, and who to contact during an emergency.
Hiking alone can be one of the most rewarding parts of solo female travel. I love the idea of enjoying a peaceful forest path or mountain viewpoint at my own pace, but independence works best with careful preparation.
In this guide, I’ll explain how to choose safer routes, prepare essential gear, handle uncomfortable encounters, and respond to emergencies without relying on another hiker.
In This Guide
- Is It Safe for a Woman to Go Hiking Alone?
- How Do You Choose a Safer Trail for Solo Hiking?
- What Should a Solo Female Hiker Pack?
- How Can You Stay Safe While Hiking Alone?
- What Should You Do If Someone Makes You Uncomfortable?
- What Should You Do During a Solo Hiking Emergency?
- Frequently Asked Questions
Is It Safe for a Woman to Go Hiking Alone?
Hiking alone can be a reasonable choice for a prepared woman on a suitable trail, but no outdoor adventure is risk-free. Your safety depends on the terrain, conditions, personal experience, and ability to get help.
Solo hiking means walking a trail without a companion who can provide immediate assistance. That freedom also makes you responsible for navigation, decisions, and your emergency plan.
What Are the Biggest Risks of Hiking Alone?
Many outdoor risks affect hikers of every gender. A twisted ankle, wrong turn, or sudden storm can become harder to manage when nobody is beside you.
- Getting lost: Confusing intersections, poor signs, and unreliable navigation can lead you away from your planned route.
- Physical injuries: Falls, ankle injuries, and exhaustion can limit your ability to return independently.
- Weather changes: Lightning, heat, cold, and heavy rain can create serious hazards.
- Limited communication: Remote trails may have no reliable cellular coverage.
- Wildlife encounters: Risks vary by habitat, season, and local animal activity.
- Unwanted attention: Harassment or threatening behavior from another person may require you to change your route or seek help.
I find it useful to separate ordinary outdoor hazards from personal security concerns. Each needs different precautions, and focusing only on strangers can distract from dangerous weather or terrain.
When Is Hiking Alone a Poor Choice?
A route isn’t suitable simply because other people have finished it. Its difficulty must match your current experience and the conditions on your hiking day.
Choose a companion, guided group, or different activity when you encounter these conditions:
- The trail requires scrambling, climbing, river crossings, or advanced navigation beyond your skills.
- Forecasts warn of dangerous storms, extreme temperatures, or flash flooding.
- You cannot establish a reliable emergency contact or rescue plan.
- The park advises against hiking alone in that area.
- You feel unwell, unusually tired, or unable to carry required supplies.
- The available daylight is too short for a comfortable return.
The U.S. National Park Service advises extra precautions for solo hikers and recommends knowing your limits. I treat that advice as a reminder that changing plans is part of responsible travel.
Pro tip: Check the official park website and relevant government travel advisory before your hike. Trail restrictions and regional safety conditions can change.
Section Takeaway: Solo hiking safety starts with choosing an activity you can reasonably manage without immediate help.
How Do You Choose a Safer Trail for Solo Hiking?
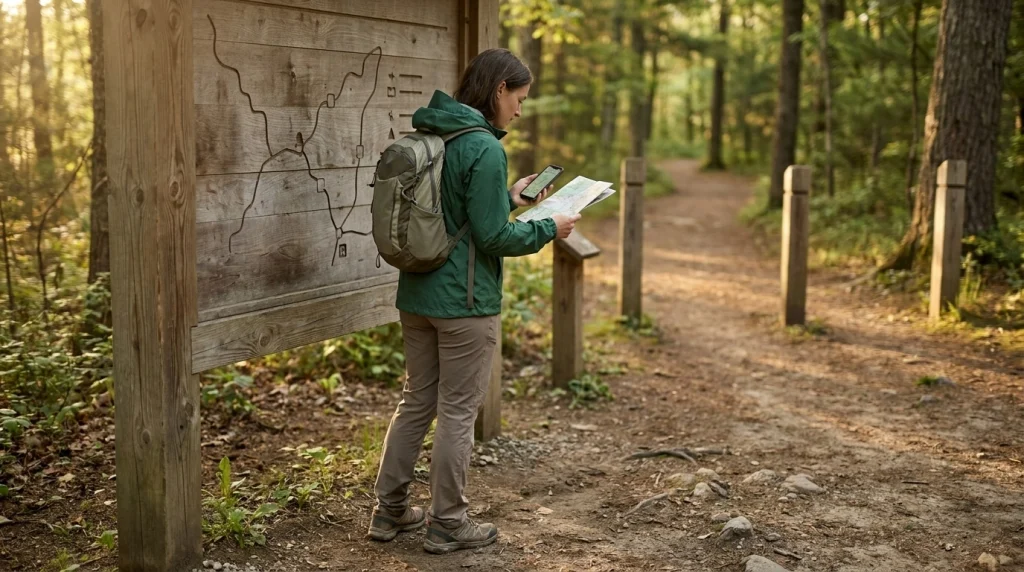
For your first solo hikes, choose a marked, maintained trail with manageable terrain and a clear return route. A popular daylight trail is generally easier to plan than a remote wilderness route.
Start With Short, Well-Marked Trails
My preferred beginner approach is to choose a route that leaves room for delays. An easy hike with a clear trailhead and frequent signs gives you more chances to notice problems early.
Consider these features before choosing:
- Distance: Start with a short route you could complete comfortably within your normal fitness level.
- Elevation: Check total climbing, not only mileage, because steep terrain can take extra time.
- Trail markings: Look for maintained routes with clear junctions and current maps.
- Visitor activity: Prefer established routes where other visitors or staff are reasonably likely to be present.
- Exit options: Identify the trailhead, return route, and any official alternative exits.
- Weather exposure: Avoid unfamiliar ridgelines, exposed summits, and flood-prone crossings during uncertain conditions.
Compare Different Types of Hiking Trails
Not all hikes offer the same support or navigation demands. This comparison can help you choose a route that matches your comfort level.
| Trail type | Main advantage | Main concern | Solo hiking suitability |
|---|---|---|---|
| Maintained nature loop, 1–3 miles | Clear route and manageable distance | Slippery surfaces or confusing junctions | Good starting option when conditions are suitable |
| Popular out-and-back hike, 3–6 miles | Familiar return path | Fatigue or elevation gain | Suitable for hikers with matching experience |
| Remote mountain trail, 6–10 miles | Quiet surroundings and longer exploration | Isolation, weather exposure, limited rescue access | Better for experienced hikers with emergency planning |
| Unmarked backcountry route | Wilderness exploration | Advanced navigation and potentially difficult rescue | Not recommended for beginners hiking alone |
These distances are illustrative, not official difficulty ratings. Even a one-mile trail can be dangerous when ice, steep drops, heat, or river crossings are involved.
Research Trail Conditions Before You Travel
Check official trail information before relying on photographs or older visitor reviews. Beautiful pictures rarely show damaged bridges, seasonal closures, or difficult trail junctions.
- Look for alerts about closures, flooding, fire, snow, or wildlife.
- Check the weather forecast for the actual trail elevation.
- Find the official map, trailhead address, and parking information.
- Review permit requirements and park operating hours.
- Confirm transport back to your hotel or accommodation.
- Ask a ranger about current conditions when staff are available.
Plan Your Return Before You Start
A daylight hiking plan needs more than a departure time. You also need a realistic turnaround time that includes breaks, photography, and slower sections.
For example, imagine planning a four-mile hike that you expect to finish in three hours. Leaving in the morning gives you more flexibility than beginning with only three hours of daylight remaining.
I recommend choosing a firm turnaround point before leaving. If you haven’t reached your goal by that time, return rather than trying to catch up.
Pro tip: Use official trail descriptions and local park alerts as your primary sources. Community reviews can add context but shouldn’t replace current authority guidance.
Section Takeaway: A shorter, predictable trail gives a beginner more control over time, navigation, and emergency decisions.
What Should a Solo Female Hiker Pack?
A solo hiker should carry supplies for navigation, hydration, unexpected weather, minor injuries, and an unplanned delay. Your exact kit should match the environment rather than a universal backpack checklist.
The National Park Service organizes essential hiking supplies into ten categories. Its Ten Essentials checklist is a practical framework for preparing.
The Essential Solo Hiking Packing List
- Navigation: A trail map, suitable compass or GPS device, and the knowledge to use them.
- Sun protection: Sunglasses, sunscreen, and protective clothing.
- Insulation: Extra clothing appropriate for unexpected cold or changing weather.
- Illumination: A headlamp or flashlight with working batteries.
- First aid: A small kit with wound supplies, blister care, and required personal medication.
- Fire supplies: Appropriate emergency fire-starting equipment where safe and legally permitted.
- Repair tools: A practical knife or multipurpose tool and simple repair materials.
- Nutrition: Extra food for unexpected delays.
- Hydration: Adequate drinking water and a way to treat more when the route requires it.
- Emergency shelter: A lightweight emergency bivy, blanket, or other suitable shelter.
For an easy day hike, some items may stay unused. That doesn’t make them unnecessary when an unexpected problem changes your schedule.
How Much Water and Food Should You Bring?
Water needs change with temperature, humidity, body size, pace, and physical effort. Check official guidance for the environment instead of assuming one bottle will last every hike.
As an illustration, carrying two liters means approximately 2 kilograms of water before adding the bottles. Consider that weight when choosing your route and backpack.
For snacks, I prefer options that travel well and don’t require preparation. Suitable choices include:
- Trail mix or nuts, when compatible with your dietary needs.
- Energy bars or other compact snacks.
- Dried fruit and simple carbohydrate-rich foods.
- Extra emergency food beyond your planned break.
Don’t rely on streams as safe drinking-water sources. If you expect to refill, learn the correct treatment method before departure.
Do You Need a GPS Device or Satellite Communicator?
A smartphone with offline maps is useful, but it doesn’t guarantee emergency communication. Cellular networks may be unavailable in mountains, forests, or remote valleys.
A satellite messenger or personal locator beacon can provide another communication option in compatible coverage areas. Learn the device’s capabilities, subscription requirements, and emergency features before carrying it.
- Download your route before leaving mobile coverage.
- Fully charge your phone and bring a power bank.
- Keep essential navigation information available offline.
- Learn how to display your coordinates.
- Test emergency equipment and understand its limitations.
What Personal Security Items Are Worth Carrying?
I prioritize simple tools that improve visibility, communication, and the ability to attract attention. Items must also comply with local laws and transportation rules.
- Whistle: Useful for signaling when calling out is difficult.
- Headlamp: Helps you navigate and be visible after unexpected delays.
- Charged phone: Supports calls and navigation wherever service is available.
- Emergency identification: Keep important medical and contact details accessible.
- Small personal essentials: Carry necessary menstrual supplies, medication, and hygiene items.
Wear shoes suited to the terrain and test your backpack before the hike. Heavy or poorly fitted equipment can create avoidable discomfort.
Section Takeaway: Pack for what could go wrong, not just what you expect to happen on a perfect hiking day.
How Can You Stay Safe While Hiking Alone?
Stay on your planned route, monitor your condition, and make conservative decisions when hiking alone. Keep enough attention on your surroundings to notice weather, wildlife, trail signs, and other people.
Tell Someone Exactly Where You’re Going
This is one of the most valuable solo hiking precautions. A trusted person needs enough information to recognize that you’re overdue and know where to seek help.
Before departure, send them:
- The park name and exact trail route.
- Your starting trailhead and planned parking location.
- Your expected start and finish times.
- Your planned turnaround time.
- A map link or saved route description.
- Instructions for contacting park staff or emergency services if you miss your check-in.
Make sure your contact agrees to this plan. A message sent to someone who isn’t watching their phone offers much less protection.
I also prefer sending a second message after returning safely. That closes the loop and prevents needless concern.
Can You Wear Headphones While Hiking Alone?
Keeping your hearing available helps you notice approaching hikers, bicycles, animals, and unusual environmental sounds. Avoid noise-canceling headphones that block important warning sounds.
If you want music, a low-volume single earbud may preserve more awareness than covering both ears. However, I prefer keeping my ears free on unfamiliar trails.
Stay on the Marked Trail
Shortcuts can lead to unstable slopes, damaged vegetation, or confusing terrain. A tempting viewpoint is rarely worth losing track of your established route.
At intersections, compare signs with your map before continuing. If something doesn’t match, stop and check rather than guessing.
Photographing a trail junction can be a useful navigation aid. It should supplement, not replace, proper maps and navigation skills.
Manage Your Energy and Turnaround Time
Don’t measure a successful hike only by whether you reach the summit. Returning safely is part of the achievement.
During your hike, regularly check:
- How much daylight remains.
- How far you are from the trailhead.
- Your drinking-water supply.
- Changes in weather and trail conditions.
- Signs of fatigue, dizziness, overheating, or cold.
Turn around early if the hike becomes harder than expected. A planned turnaround time is a limit, not a challenge to beat.
How Should You Handle Wildlife?
Wildlife precautions depend on the specific animals present. Learn local instructions before entering bear, snake, large-cat, or other wildlife habitats.
The U.S. Fish and Wildlife Service recommends maintaining distance and avoiding feeding wild animals.
- Never approach wildlife for photographs.
- Avoid feeding animals or leaving food scraps behind.
- Follow posted guidance about food storage.
- Give animals room to move away.
- Follow species-specific local instructions if an animal approaches.
Don’t assume one response works for every animal. Bear encounter guidance, for example, depends on species and circumstances.
Use a Simple Safety Check at Every Major Junction
I like the idea of a brief self-check whenever a trail changes direction. It takes little time and can prevent several small problems from growing.
- Route: Am I still following the planned path?
- Time: Can I return before my limit?
- Body: Do I feel steady, hydrated, and alert?
- Conditions: Has anything changed enough to justify turning back?
Section Takeaway: Safe solo hiking depends on regular decisions throughout the trip, not one checklist completed before departure.
What Should You Do If Someone Makes You Uncomfortable While Hiking?
If another person’s behavior makes you feel threatened, prioritize distance, access to other people, and a safe exit. You don’t owe anyone personal information or continued conversation.
Most encounters on established trails may be ordinary social interactions. Still, it’s sensible to prepare for unwanted attention without treating every stranger as a threat.
Protect Your Personal Information
You can be polite without revealing your plans. Keep details about your accommodation, exact route, and whether anyone expects you private.
If someone asks uncomfortable questions, use a short response such as these:
- “I’m keeping to my hiking schedule today.”
- “I’d rather keep my plans private.”
- “I need to get going now.”
- “No, thank you. I prefer to hike by myself.”
You can end the conversation without apologizing. Being friendly is optional when you feel uneasy.
What If Someone Appears to Be Following You?
One person walking behind you doesn’t automatically mean you’re being followed. Pay attention to patterns of behavior rather than assuming intent.
If you believe the situation is threatening, consider these actions:
- Stay on established routes rather than escaping into unknown terrain.
- Move toward staffed facilities, visible groups, or other safe public areas if accessible.
- Avoid isolated shortcuts and confrontations that could increase danger.
- Call local emergency services if you face an immediate threat and have reception.
- Use an emergency signaling device if you need urgent assistance and it is appropriate.
If moving toward others would lead you into more dangerous terrain, assess your safer options before acting. Personal security plans should never ignore cliffs, rivers, or navigation hazards.
Should You Share Your Location on Social Media?
I recommend avoiding public, real-time updates that reveal your exact trail position or accommodation. Sharing photographs after leaving an area offers more privacy.
Private location sharing with a trusted emergency contact serves a different purpose. It can supplement your hiking plan, although signal loss and battery failure may interrupt updates.
Is Hiking With an Organized Group Safer?
A guided hike can offer social support, local knowledge, and help with route decisions. However, a group doesn’t remove weather, injury, or environmental risks.
For someone building confidence, a ranger-led walk or established hiking group can be a useful bridge toward independent trips.
Look for organized activities through official parks, reputable local guides, and established outdoor organizations. Verify credentials and safety arrangements before booking.
Section Takeaway: Maintain boundaries, protect your location information, and choose the safest available exit when someone’s behavior becomes concerning.
What Should You Do During a Solo Hiking Emergency?
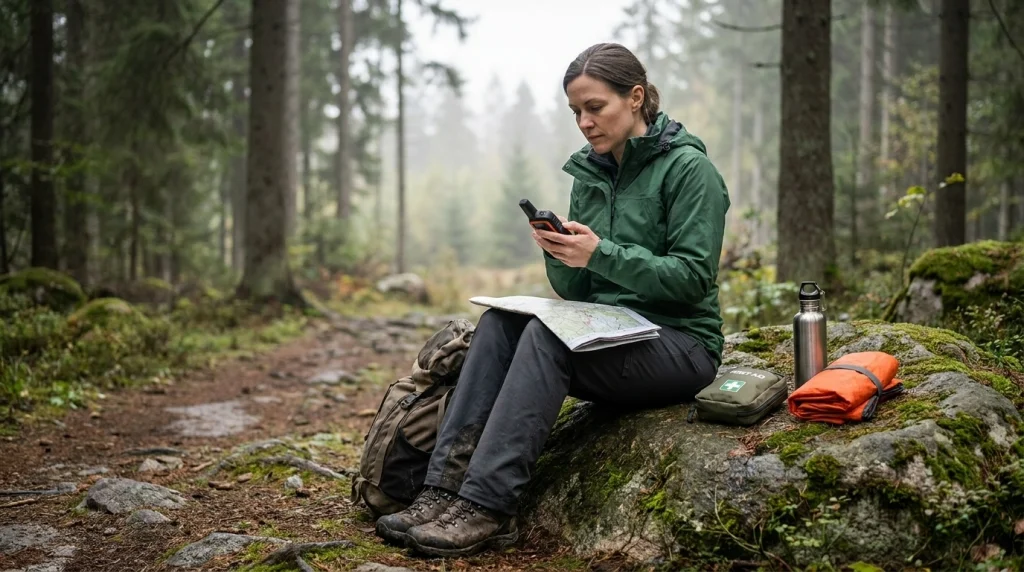
Stop, assess the immediate danger, and seek appropriate help. Avoid making a bad situation worse by rushing into unfamiliar terrain or continuing despite an injury.
What If You Get Lost While Hiking Alone?
If you lose the trail, stop moving until you understand your position. Continuing downhill or following an unmarked path without evidence can take you farther from safety.
The U.S. Forest Service recommends remaining calm, using navigation tools, and avoiding aimless movement when lost.
- Stop: Find a safe location away from immediate hazards.
- Think: Recall your last confirmed trail marker or junction.
- Observe: Compare surrounding landmarks with your map or GPS coordinates.
- Communicate: Contact emergency services if needed and possible.
- Protect yourself: Use extra clothing, food, water, and shelter while awaiting help.
If you cannot confidently retrace a safe, known route, staying in a secure location may be the better choice. Emergency responders can give situation-specific instructions when communication is available.
What If You Become Injured?
First, move only as needed to avoid immediate danger. Assess whether you can travel without worsening your condition.
For serious injuries, request emergency help as soon as possible. The National Park Service outdoor emergency plan offers practical guidance on signaling and responding to injuries.
- Call the local emergency number if you can.
- Share your exact location or coordinates when available.
- Control significant external bleeding with firm direct pressure.
- Protect yourself from cold, heat, and further injury.
- Signal for help when appropriate.
- Follow emergency dispatcher instructions.
Do not attempt a difficult self-rescue when you cannot move safely. A minor problem can become much worse if you fall again.
What If a Storm Starts Unexpectedly?
Weather can change rapidly, especially in mountainous areas. Watch for darkening skies, falling temperatures, strong winds, and thunder.
If thunder is audible, seek appropriate substantial shelter when safely accessible. Avoid exposed summits, isolated trees, and other lightning hazards.
Heavy rain can make stream crossings and low-lying areas dangerous. Never enter fast-moving floodwater simply to stay on schedule.
If travel isn’t safe, use your emergency supplies while evaluating your options. Follow local park instructions whenever available.
How Do You Call for Help Without Cell Service?
A phone cannot place a normal call where its required network coverage is unavailable. Some devices support satellite emergency communication, but availability depends on hardware, region, conditions, and service.
A dedicated satellite communicator or personal locator beacon may help in suitable environments. Neither replaces a route plan, navigation skills, or awareness of terrain.
When making an emergency report, provide:
- Your location or GPS coordinates.
- The trail name and nearest known landmark.
- The type and seriousness of the emergency.
- Relevant injuries or medical concerns.
- Your available shelter, water, and communication equipment.
Save local emergency numbers before traveling internationally. Emergency services and rescue arrangements are different across countries.
What Should You Do After Returning Safely?
Contact the person holding your hiking plan immediately. This is especially important if your return time changed or you were temporarily unreachable.
Afterward, review what worked and what needs improvement. A confusing junction or underestimated climb can teach you how to plan your next route better.
Pro tip: Before visiting an unfamiliar destination, review official park emergency guidance and your government’s travel advice. Confirm local rescue procedures rather than assuming emergency systems work the same everywhere.
Section Takeaway: Your emergency plan should identify how to stay safe, share your location, and request assistance when normal travel becomes impossible.
Frequently Asked Questions About Solo Female Hiking Safety
Is it safe for a beginner woman to hike alone?
A beginner may choose a short, maintained daylight trail after checking its conditions and difficulty. Start with manageable terrain, tell a trusted person your route, carry essential supplies, and avoid remote or technical hikes until you’ve developed the necessary skills.
Should a solo female hiker carry pepper spray?
Local laws, transportation rules, and personal training should guide that decision. Pepper spray isn’t legal everywhere and can be ineffective or misused. It also isn’t a replacement for avoiding dangerous situations, maintaining distance, and knowing how to request emergency help.
Is it safer to hike alone in the morning?
Morning hiking often provides more daylight for completing a trail and managing delays. However, actual safety depends on weather, temperature, wildlife activity, trail conditions, and your fitness. Choose a start time based on local conditions rather than assuming mornings are always safer.
What is the best hiking app for solo female travelers?
The best option is a navigation app that supports reliable offline maps for your destination and that you know how to use. Check coverage, map accuracy, and route updates before departure. Carry backup navigation because phones can lose power or fail.
Should I tell strangers that I’m hiking alone?
You don’t need to disclose that you’re alone. If someone asks personal questions, you can give a neutral answer or decline to share details. Save your exact route, return schedule, and accommodation information for trusted contacts or appropriate emergency personnel.
What should I do if I feel scared while hiking alone?
Stop somewhere safe and identify what’s causing the concern. If the trail, weather, your physical condition, or someone’s behavior creates a genuine safety issue, consider returning or seeking help. It’s reasonable to end a hike early without reaching your destination.
Can I hike alone without phone reception?
It may be possible for experienced hikers with suitable navigation, emergency equipment, and a reliable trip plan. However, limited communication increases the consequences of problems. Beginners should generally choose more accessible trails and consider guided alternatives for remote areas.
Final Takeaway: Hike Independently, but Plan Carefully
Learning how a solo female traveler can stay safe while hiking alone doesn’t mean removing every risk. It means choosing suitable routes, preparing for changing conditions, and recognizing when to turn back.
Start with a manageable daylight hike and build experience gradually. Share your itinerary, carry appropriate gear, and make decisions based on current conditions rather than pressure to finish.
Your independence should feel empowering, not like a test of bravery. A safe return is always worth more than a summit photo.
Before your next hike: Choose one suitable trail, download its official map, check current alerts, and send a trusted person your complete hiking plan.