How Can a Woman Create a Simple Itinerary for Her First Solo Trip?
Quick Answer
A woman can create a simple itinerary for her first solo trip by choosing one easy base, planning one main activity each day, organizing transportation before arrival, and leaving free time between plans. Keep the schedule flexible enough to change if you become tired, uncomfortable, or discover something better, and review the U.S. State Department guidance for women travelers before an international trip.
Build Your First Solo Itinerary in Six Steps
- Choose one base: Stay in one city or compact area instead of changing accommodation every night.
- Plan your arrival: Know how you’ll get from the airport or station to your accommodation before leaving home.
- Pick one anchor: Schedule one important attraction, tour, or activity each full day.
- Leave free blocks: Keep several hours open for meals, rest, spontaneous stops, or changing your mind.
- Protect your evenings: Decide how you’ll return to your accommodation before heading out.
- Add backups: Save alternate transport, payment, maps, booking details, and emergency contacts.
A Good Beginner Rule
- If your itinerary looks exhausting before you leave home, remove something.
If you’re wondering how can a woman create a simple itinerary for her first solo trip, start by forgetting the idea that you need to fill every hour.
A good first solo trip itinerary gives you enough structure to feel secure while leaving enough room to travel at your own pace.
I think of an itinerary as a safety net, not a contract. It should answer the important questions without controlling every minute of your day.
In This Guide
- What Should a First Solo Trip Itinerary Look Like?
- How Should You Choose a Destination for Your First Solo Trip?
- How Should You Plan Each Day Without Overplanning?
- How Do You Plan Transportation, Accommodation, and Safety?
- What Does a Simple First Solo Trip Itinerary Look Like?
- What Should You Check Before You Leave?
- Frequently Asked Questions
- Final Takeaway
What Should a First Solo Trip Itinerary Look Like?
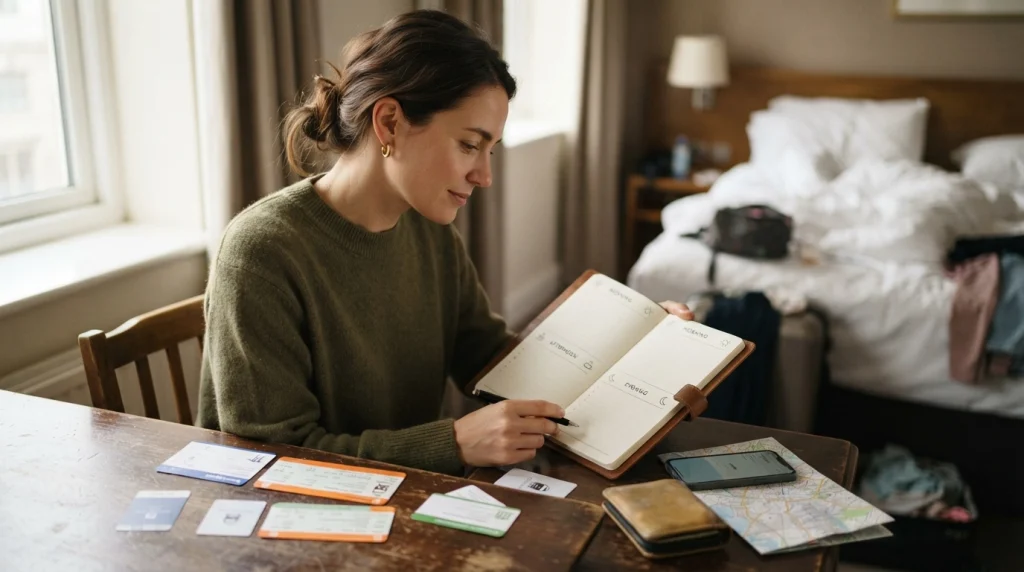
A first solo trip itinerary should be simple, flexible, and easy to understand at a glance. You should know where you’re sleeping, how you’re getting there, and the main purpose of each day.
You don’t need a spreadsheet containing activities every 30 minutes. In fact, that often makes a first trip harder.
A solo trip itinerary is a basic plan covering your accommodation, transportation, activities, important reservations, and enough backup information to make independent travel manageable.
Start with the fixed parts
I always build around the details that are hardest to change. Once those are clear, everything else becomes much easier.
- Arrival date and time: Know when you will reach the destination.
- Accommodation: Keep the address, check-in time, and contact details handy.
- Departure: Know when you need to leave and how you’ll reach your airport or station.
- Timed reservations: Add tickets, tours, performances, or restaurant bookings that cannot move easily.
These become the skeleton of your trip. Your cafés, shopping, neighborhood walks, and optional attractions can fit around them.
Use one main activity per day
For a first solo trip, I prefer one important activity each day. That could be a museum, food tour, hike, market, historical site, or neighborhood walk.
The rest of the day remains flexible.
- Morning: breakfast and an easy start.
- Main activity: your one planned attraction or experience.
- Afternoon: an optional second stop, café, park, shopping, or rest.
- Evening: dinner somewhere convenient and a simple return route.
This system reduces decision fatigue without making you feel trapped.
Plan by area instead of crossing the city repeatedly
Group nearby attractions together whenever possible. A map can make an ambitious itinerary look much less appealing once you notice the travel time between stops.
If a museum, historic district, market, and café are all in the same area, make that your neighborhood for the day.
| Planning Style | Overplanned Itinerary | Simple Solo Itinerary |
|---|---|---|
| Daily activities | 5–7 scheduled stops | 1 main activity plus optional stops |
| Free time | Little or none | Several open hours daily |
| Hotel changes | Frequent | One base when practical |
| Evenings | Planned until late | Flexible and close to accommodation |
| Unexpected delays | Disrupt the whole day | Easy to absorb |
Section Takeaway: Build your itinerary around the parts that must happen, then leave everything else flexible.
How Should You Choose a Destination for Your First Solo Trip?
Your first solo destination should interest you without creating unnecessary logistical stress. Easy transportation, a manageable size, and plenty of daytime activities matter more than choosing somewhere impressive.
I would rather take a relaxed three-night trip to an easy city than spend four days fighting complicated transfers.
Choose simplicity before novelty
Look at the everyday details before booking flights or trains.
- Arrival: Can you reach your accommodation without several confusing transfers?
- Transportation: Can you walk, use established public transport, or use reputable taxis or ride services?
- Accommodation choice: Are there several suitable places in convenient areas?
- Activities: Can you find things you would enjoy doing alone?
- Food: Are restaurants, cafés, supermarkets, or takeaway options easy to reach?
- Backup options: Would bad weather or one closure still leave you with things to do?
A compact city can work well because you can reduce complicated journeys. A smaller town can also work if transport schedules are frequent enough.
Keep your first trip reasonably short
You don’t need to begin with a month abroad. A short trip can teach you how you respond to eating alone, navigating independently, managing downtime, and making every daily decision yourself.
For many beginners, three to five days is enough to experience solo travel without building an exhausting itinerary.
- Two nights: Useful for a low-pressure practice trip.
- Three to five nights: Enough time to settle in and experience several independent travel days.
- One week: Better if you already feel comfortable navigating alone or the destination involves long travel times.
Longer isn’t automatically better. Your first trip is partly about learning what kind of traveler you are.
Check practical conditions before booking
For international travel, review current entry rules, local laws, transportation guidance, and travel advisories before you commit money.
The U.S. State Department international travel checklist is one useful starting point for American travelers.
If you’re not American, use your own government’s foreign-travel service for destination-specific guidance.
Pro tip: Travel conditions change. Check your government’s current destination advisory shortly before booking and again before departure.
Section Takeaway: The easiest first destination is one where normal daily tasks feel manageable, not one with the longest list of famous attractions.
How Should You Plan Each Day Without Overplanning?
Plan enough to avoid standing on a street wondering what to do next, but not enough to turn your vacation into a timetable.
The easiest method is to use morning, afternoon, and evening blocks.
Give each day one anchor
Your anchor is the one activity you would be disappointed to miss. Put that on the calendar first.
Examples include:
- A guided walking tour at 10:00 a.m.
- A museum ticket at noon.
- A cooking class at 3:00 p.m.
- A national park excursion.
- A concert or theater reservation.
Don’t automatically add another reservation before and after it. Let the anchor organize the rest of your day.
Add optional activities nearby
Choose two or three possibilities around your main activity. These aren’t obligations.
- A café you’ve saved.
- A nearby market.
- A park or waterfront walk.
- A small museum.
- A shopping street.
- A place to sit and people-watch.
When you have energy, use one. When you don’t, skip it.
Schedule rest before you think you’ll need it
Solo travel can create more mental work than traveling with someone. You handle navigation, tickets, meals, safety decisions, directions, and problem-solving yourself.
That can be tiring even when you’re having a wonderful time.
I like leaving at least one open block each day. Sometimes it becomes a long lunch, an hour at the hotel, laundry, or an unexpected conversation.
Those gaps aren’t wasted time. They’re what keep a trip from becoming a checklist.
Keep the first evening especially light
Arrival days contain more variables than normal sightseeing days. Flights run late, baggage takes time, trains change platforms, and unfamiliar streets look different after dark.
My ideal first evening is intentionally boring.
- Reach the accommodation.
- Check in and settle your bags.
- Save the accommodation location on your phone.
- Send a short arrival message to someone you trust.
- Walk around the immediate area if you still have daylight and energy.
- Eat somewhere easy.
- Return early enough to sleep properly.
You don’t need to prove anything on night one.
Section Takeaway: One anchor activity plus flexible nearby options creates structure without turning your solo trip into a race.
How Do You Plan Transportation, Accommodation, and Safety?
Handle your basic logistics before filling the itinerary with attractions. Knowing where you’ll sleep and how you’ll move around removes a surprising amount of anxiety.
I call these the boring decisions. They are also some of the most useful.
Plan the arrival journey before departure
Don’t wait until you’re standing outside an unfamiliar airport or station to decide how to reach your accommodation.
- Write down the accommodation’s full address.
- Check the recommended airport or station transfer options.
- Save the route offline where possible.
- Know roughly how long the journey should take.
- Keep enough battery and payment options available.
- Identify an alternative transport option.
The State Department’s current women-traveler guidance specifically recommends researching safe transportation and using licensed, reputable services where appropriate.
Choose accommodation for location, not just price
A cheap room can become expensive in time and transportation if it’s far from everything you want to do.
For a first solo trip, I prioritize convenience.
- Recent guest reviews.
- A location near transport or walkable attractions.
- Clear check-in procedures.
- Reliable reception or host communication.
- Food and basic services nearby.
- A return route you’re comfortable using after dinner.
A hostel can be a social choice, but it isn’t mandatory. A hostel is simply budget accommodation that often includes shared rooms or communal areas.
If privacy helps you rest, a private hotel room, guesthouse, or apartment may fit you better.
Create a small safety information sheet
Keep the information on your phone and consider an offline copy.
- Accommodation address and phone number.
- Passport or identification details.
- Travel insurance details, if applicable.
- Important reservation numbers.
- Local emergency number.
- Emergency contact at home.
- Embassy or consulate details when traveling internationally.
- Backup payment information stored securely.
If you’re an eligible U.S. citizen traveling internationally, the Smart Traveler Enrollment Program (STEP) lets you register a trip with the State Department.
Share enough information without reporting every movement
A trusted person should know your basic itinerary, accommodation, and major transport details. Agree on a realistic check-in pattern before leaving.
You don’t need to send updates every 15 minutes.
- Share confirmed accommodation.
- Share flight, train, or bus details.
- Agree when you’ll normally check in.
- Explain what they should do if they genuinely cannot reach you.
This is more useful than vague promises to “message all the time.”
Pro tip: For international travel, check official destination guidance rather than relying only on social-media stories or old travel posts.
Section Takeaway: Plan your sleeping place, arrival route, return transportation, and backup information before worrying about filling every sightseeing hour.
What Does a Simple First Solo Trip Itinerary Look Like?

A four-day itinerary gives you enough structure to see how the system works. You can shorten or expand it for your destination.
The destination isn’t important here. The rhythm is.
Day 1: Arrive and make your world small
- Arrival: Travel to your accommodation using the route you researched.
- Check-in: Unpack only what you need and charge your phone.
- Orientation: Locate a nearby café, pharmacy, supermarket, or transport stop.
- Dinner: Choose somewhere close and easy.
- Evening: Review tomorrow’s main activity and rest.
I wouldn’t put a major prepaid attraction on arrival day unless the timing is unusually dependable.
Day 2: Do the thing you came for
- Morning: Eat breakfast and head to your most important attraction.
- Late morning or afternoon: Complete your main tour, museum, neighborhood walk, or activity.
- Afternoon: Choose one optional stop nearby.
- Rest: Return to your room for an hour if you need it.
- Evening: Have dinner in an area you already understand.
Your second day is a good time for the activity you’re most excited about. You usually have more energy than on arrival day.
Day 3: Add independence and optional social time
- Morning: Explore somewhere at your own pace.
- Midday: Have lunch without rushing.
- Afternoon: Join an optional group activity such as a walking tour, cooking class, or workshop.
- Evening: Decide based on your energy rather than your original plan.
A structured group activity can be useful because you can meet people without depending on them for the rest of your trip.
Day 4: Keep departure simple
- Morning: Pack before sightseeing.
- Breakfast: Visit somewhere close.
- Optional stop: Choose one small attraction only if timing allows.
- Departure: Leave comfortable buffer time for your airport or station journey.
Don’t squeeze an attraction into the final hour because it looks close on a map.
A simple itinerary template you can copy
| Time | Plan | Status |
|---|---|---|
| Morning | Breakfast + main activity | Main plan |
| Lunch | Choose somewhere near the main activity | Flexible |
| Afternoon | Optional attraction, café, shopping, or rest | Optional |
| Evening | Dinner + straightforward route back | Flexible |
This is deliberately simple.
If I want to add something during the trip, I can. If I wake up exhausted, I can remove the optional block without destroying the entire day.
Section Takeaway: A beginner-friendly itinerary has one purpose for each day, not a long list of obligations.
What Should You Check Before You Leave?
Do one final itinerary check a few days before departure. Your goal is to catch missing information, not add more activities.
Confirm the bookings that matter
- Transportation to the destination.
- Accommodation dates.
- Airport or station transfer plan.
- Prepaid tours and tickets.
- Return transportation.
- Travel insurance, if purchased.
Save confirmation emails or screenshots somewhere you can access without perfect internet.
Check health information for international trips
Health recommendations can differ by destination and can change over time.
The CDC Travelers’ Health website provides destination-specific health information for international travelers.
Pro tip: Check official health guidance for your destination before departure, especially for vaccines, medicines, outbreaks, or other changing requirements.
Download what you may need offline
- Destination map.
- Accommodation address.
- Transport tickets.
- Flight or train details.
- Important reservation confirmations.
- Emergency contacts.
- A copy of your basic itinerary.
Offline information matters most at the exact moment your phone loses data.
Check the emotional side of the plan
Look at your schedule and ask whether it feels exciting or exhausting. Those are different feelings.
Remove activities that exist only because you feel you’re “supposed” to see them.
- Is there enough time to sleep?
- Do I have an unscheduled block most days?
- Am I changing hotels unnecessarily?
- Do I know how I’ll get home after evening activities?
- Could I cancel one activity without ruining the trip?
- Do I have enough budget for unexpected transport or meals?
The itinerary should make you calmer when you read it.
Section Takeaway: Your final check should remove uncertainty, not add more sightseeing.
Frequently Asked Questions
How detailed should a first solo trip itinerary be?
A first solo trip itinerary should cover accommodation, transportation, key reservations, and roughly one important activity each day. You don’t need to schedule every meal or hour. Leave open blocks so you can rest, explore spontaneously, or change plans without disrupting the entire trip.
How many activities should I plan each day when traveling alone?
For a first solo trip, one main activity per day is a comfortable starting point. Add one or two nearby optional activities rather than more fixed reservations. This reduces rushing and gives you room to adjust for weather, energy, delays, or unexpected discoveries.
Should I book everything before my first solo trip?
No. Book the things that could create problems if unavailable, such as accommodation, major transportation, and popular timed attractions. Leave flexible activities, ordinary meals, cafés, parks, and neighborhood walks open unless the destination requires advance reservations.
Is it better to stay in one place on a first solo trip?
Usually, one base makes a first solo trip easier. You avoid repeated check-ins, packing, luggage transport, and unfamiliar arrival routines. A multi-city trip can work, but each additional move adds logistics that may not improve a short beginner trip.
How much free time should I leave in a solo itinerary?
Try to leave at least one flexible block each day. That might mean an open afternoon, an unplanned evening, or several hours between activities. Free time gives you space for meals, rest, unexpected delays, and spontaneous discoveries.
What should I do if I feel overwhelmed during my first solo trip?
Reduce the itinerary immediately. Go somewhere comfortable, eat, drink water, charge your phone, and focus only on your next necessary task. Optional sightseeing can wait. A smaller plan often feels manageable again once you’ve rested and reduced the number of decisions.
Should I share my solo trip itinerary with someone?
Yes. Share your accommodation, major transportation, and basic schedule with someone you trust. Agree on sensible check-ins and explain what they should do if they cannot reach you. You don’t need to report every small movement for the plan to be useful.
Final Takeaway
The simplest answer to how can a woman create a simple itinerary for her first solo trip is to plan the essentials first and protect your flexibility.
Choose one manageable base, understand your arrival route, schedule one main experience each day, and leave open time around it.
Your itinerary should help you answer five basic questions:
- Where am I sleeping?
- How am I getting there?
- What is the main thing I want to do today?
- How will I get back comfortably?
- What can I skip if I’m tired or plans change?
If those answers are clear, you already have a useful solo trip plan.
You can always add another museum, café, walk, or tour once you’re there. It’s much harder to recover the relaxed feeling of a trip after you’ve packed every hour with obligations.
For your first journey, make the plan easy enough that you have room to enjoy being there.