How Can a Solo Female Traveler Inspect a Rental Car?
Quick Answer
A solo female traveler should inspect a rental car from every angle before accepting the keys. Check for existing damage, examine the tires and windscreen, test the lights and essential controls, review the dashboard, and confirm the rental paperwork. Take clear photos and a continuous video, report every concern to the rental agent, and obtain written confirmation before driving away.
Your essential pre-drive checks
- Exterior damage: Photograph scratches, dents, chipped glass, damaged bumpers, and wheel marks.
- Tires and wheels: Look for cuts, bulges, visibly worn tread, and other obvious damage.
- Lights and visibility: Test headlights, indicators, brake lights, mirrors, and windscreen wipers.
- Interior and controls: Check seat belts, dashboard warnings, air conditioning, locks, and basic driving controls.
- Documents and costs: Confirm the rental agreement, insurance terms, fuel policy, roadside assistance, and emergency contact details.
- Written evidence: Ensure all existing damage appears on the condition report before you leave.
One rule worth remembering
- Never feel pressured to accept a vehicle with unresolved safety concerns. Ask for another car or contact the rental company’s support team from a safe place.
Inspecting a rental car before driving is one of the simplest ways to protect your safety, travel budget, and peace of mind when traveling alone. I recommend setting aside 15–20 minutes for a careful inspection, especially if you’re unfamiliar with the vehicle or driving in a new country.
This guide explains what to examine, how to document existing damage, which warning signs deserve attention, and what to do if a rental agent rushes you. The goal is to start your solo trip with a car you understand and feel comfortable driving.
In This Guide
- Why should solo female travelers inspect a rental car?
- How do you check a rental car’s exterior for damage?
- Which safety and mechanical checks matter most?
- What should you check inside the car and in the paperwork?
- How should you document damage and deal with rental staff?
- When should you reject a rental car?
- Frequently asked questions
Why Should Solo Female Travelers Inspect a Rental Car?

A rental car inspection is a practical safety check and a record of the vehicle’s condition before you accept responsibility for it. It helps you identify visible problems, understand the controls, and reduce disputes about pre-existing damage.
For women traveling alone, that preparation has an additional benefit: you can identify problems while rental staff are still available, rather than discovering them at an isolated roadside stop.
What does a rental car inspection involve?
A rental car inspection is a systematic check of a hired vehicle’s exterior, tires, windows, interior, basic functions, dashboard, and accompanying documents before you drive it away. It also includes documenting the car’s condition with photographs and the rental company’s written report.
You don’t need to be a mechanic. Your job is to identify visible damage, test basic functions, and ask a qualified rental employee to investigate anything concerning.
Why is checking the car before departure so important?
Imagine collecting a car for a three-day solo road trip. You have accommodation booked, a route planned, and daylight to make the first drive comfortably.
If you discover a damaged tire or an unexplained dashboard warning after leaving the rental lot, you may have to rearrange those plans. Sorting it out before departure is usually easier.
There are three main reasons to inspect carefully:
- Personal safety: Identify obvious problems with tires, visibility, lights, seat belts, and essential controls.
- Financial protection: Record existing scratches, dents, and other damage to help challenge an incorrect damage claim.
- Driving confidence: Learn how the headlights, wipers, parking brake, fuel door, and other controls work before entering unfamiliar traffic.
Consumer guidance from the Competition and Consumer Protection Commission recommends recording existing damage and taking your own photographs before departure.
Section takeaway: Inspect the vehicle before accepting it, not after your journey has begun. A few extra minutes can help protect your safety and your rental deposit.
How Do You Check a Rental Car’s Exterior for Damage?
Walk slowly around the entire vehicle in good lighting, checking every side, the roof where visible, the bumpers, the windows, and the wheels. Photograph every mark you find, even if it looks minor.
Don’t assume the rental company’s existing damage report is complete. Compare it with the actual vehicle before signing off on its condition.
Follow a complete exterior inspection
Start at the driver’s door and move around the car in one direction. This makes it easier to cover every area without forgetting a panel.
- Front bumper and hood: Look for scrapes, dents, loose trim, and paint damage.
- Front windscreen: Check for chips, cracks, and damage that could affect your view.
- Driver’s side: Examine both doors, door handles, side mirrors, and visible body panels.
- Rear of the car: Check the bumper, rear window, tailgate or trunk, and rear lights.
- Passenger side: Repeat the inspection for doors, panels, mirrors, and wheel arches.
- Roof and lower body: Look for visible dents, scrapes, or damage where you can safely see it.
- Wheels and tires: Inspect all four for obvious damage, missing components, and uneven or severely worn tread.
Pay special attention to low bumpers and wheel rims. Scrapes around these areas can be easy to miss when you’re eager to start driving.
What damage should you photograph?
Record any visible mark that isn’t already documented, including small scratches and windshield chips. Photograph the full panel first, then take a close-up that clearly shows the damage.
Capture these details:
- Scratches, dents, paint chips, and scuffed bumpers.
- Cracked glass, chipped windscreens, and damaged mirrors.
- Wheel-rim scrapes, tire damage, and broken trim.
- Existing stains, torn upholstery, or damaged interior fittings.
- The license plate, fuel gauge, and odometer reading.
Use your phone’s camera to record a continuous walkaround video as well. Keep it steady and pause briefly at each existing mark.
What if the car is dirty or the lighting is poor?
Don’t assume a dirty car is damage-free. Dust, mud, rain, and dim parking garages can conceal scratches, dents, and glass damage.
Ask the rental employee to move the vehicle to a well-lit area or clean the relevant surface so you can inspect it properly. If that’s impossible, document the visibility problem and ask for written instructions before accepting the car.
Section takeaway: Complete a full walkaround and photograph existing damage before you leave. If you cannot inspect the vehicle adequately, ask for better lighting or another car.
Which Safety and Mechanical Checks Matter Most?
Prioritize anything that affects braking, steering, visibility, tires, or your ability to operate the vehicle safely. You can test basic functions yourself, but a rental employee or qualified technician should investigate mechanical concerns.
A vehicle can look spotless and still have a safety problem. Appearance alone is not enough.
How should you inspect the tires and wheels?
Check all four tires for obvious cuts, cracks, bulges, embedded objects, and signs of severe wear. Look for a visibly flat tire or a wheel that appears damaged.
Also check the following:
- Look for tread that appears dangerously worn or uneven.
- Ask the rental agent to check any tire that looks underinflated.
- Confirm whether the car has a spare tire or an approved repair kit.
- Ask where roadside assistance is available if you get a flat.
Never crawl under the vehicle or put yourself in an unsafe position to inspect its underside. If a tire looks damaged, don’t attempt a test drive to see whether it feels normal.
Which lights, windows, and controls should you test?
Test the basic features while the car is parked. Ask an employee to help verify functions that require someone outside the vehicle, such as brake lights.
- Exterior lights: Test headlights, high beams, indicators, brake lights, and hazard lights.
- Visibility: Check the windscreen, side mirrors, rear-view mirror, and wipers.
- Safety equipment: Check that seat belts latch and retract properly.
- Comfort: Test the air conditioning or heating, especially if weather conditions make it important.
- Access: Confirm that doors, windows, and locks work as expected.
- Driving controls: Locate the gear selector, parking brake, horn, and headlight controls.
Ask the rental employee to explain unfamiliar features. This is particularly useful when switching between automatic and manual transmission or driving a model with unfamiliar electronic controls.
What should you look for on the dashboard?
Start the car according to the rental agent’s instructions and check for warning lights that remain illuminated after the normal startup sequence. The meaning of an indicator depends on the vehicle, so don’t guess if you see an unfamiliar symbol.
Ask the agent to explain any warning or arrange a professional check. Never ignore a warning involving the brakes, engine temperature, oil pressure, or another potentially serious system.
Also check the fuel gauge and odometer. Record both readings so they match the rental paperwork and the agreed fuel policy.
Should you test-drive the rental car?
If the rental company permits it, a short test drive in a safe area can help you assess basic operation before starting a longer journey. Follow the company’s procedure and local traffic laws.
Pay attention to:
- Unusual braking behavior or warning lights.
- Steering that feels unexpectedly heavy or unstable.
- Unusual noises, vibrations, or signs of overheating.
- Difficulty selecting gears or operating basic controls.
Stop in a safe place if something feels wrong. Contact the rental company rather than trying to diagnose or repair the vehicle yourself.
Section takeaway: Prioritize tires, lights, visibility, seat belts, and warning indicators. If you find a safety-related problem, ask for a replacement vehicle or professional assessment instead of driving away.
What Should You Check Inside the Car and in the Paperwork?
Before leaving, check the cabin, luggage space, required documents, and rental agreement. Make sure the vehicle matches your booking and that you understand the rules for insurance, deposits, fuel, mileage, and roadside assistance.
How do you inspect the interior?
Open each door and inspect the areas you’ll use during your trip. Look for damage, missing equipment, unusual smells, and anything that could affect your comfort or safety.
- Driver’s seat: Check the upholstery, seat adjustment, and head restraint.
- Seat belts: Check the belts for visible damage and make sure the buckles latch securely.
- Dashboard: Look for warning indicators and confirm that the essential controls are accessible.
- Mirrors: Adjust the side and rear-view mirrors to suit your driving position.
- Door locks: Check that the doors lock and unlock correctly.
- Boot or trunk: Look for existing damage and check that the space meets your luggage needs.
- Emergency equipment: Ask about the spare tire or repair kit, warning triangle, and other equipment required or supplied locally.
Check the cabin for personal belongings left by the previous renter. If you find anything, hand it to the rental employee rather than keeping it in the car.
Which rental documents should you confirm?
Paperwork matters as much as the vehicle’s physical condition. Before signing, make sure the agreement accurately reflects your booking and the terms you’ve accepted.
Review this checklist:
- Vehicle identity: Confirm the license plate or other vehicle identifier matches the paperwork.
- Rental period: Check the pickup date, return date, times, and return location.
- Driver authorization: Confirm your driving license and any required international driving permit meet local requirements.
- Insurance: Understand what’s covered, the excess or deductible, exclusions, and any separate tire or glass restrictions.
- Deposit: Confirm the amount, payment method, and expected release process.
- Fuel and mileage: Check the fuel-return policy, mileage limits, and possible additional charges.
- Breakdown support: Save the rental company’s assistance number and instructions for accidents or breakdowns.
- Cross-border travel: If you plan to enter another country, confirm that the agreement explicitly permits it.
Don’t assume that a quoted insurance package covers every type of damage. Some rental agreements exclude particular components or impose separate conditions.
The UK government’s rental car consumer guidance explains why travelers should review excess charges, insurance exclusions, and the vehicle’s condition before leaving.
What if you’re renting abroad?
Requirements vary by country, rental company, and vehicle. Check the destination’s driving rules and official travel advice before collecting the keys.
For a solo road trip, I would also make sure I knew how to contact roadside assistance, what to do after an accident, and whether the rental company provides a replacement car if the vehicle becomes unusable.
Pro tip: Check the destination’s official government travel guidance and local road authority information for current driving requirements, emergency procedures, and any special rules for foreign drivers.
Section takeaway: Confirm that the vehicle, paperwork, insurance terms, and emergency support all match your plans. If a term is unclear, get an explanation before signing.
How Should You Document Damage and Deal With Rental Staff?
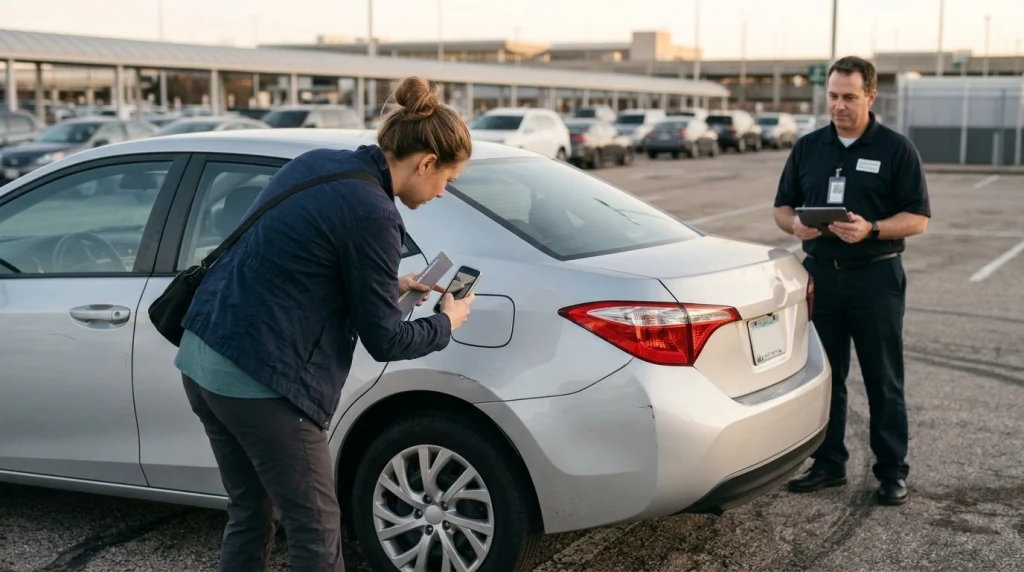
The safest approach is to combine clear photographic evidence with a written record accepted by the rental company. Photos help show what the car looked like, while the signed condition report provides a record of what the company acknowledged.
Documenting damage isn’t an accusation. It’s a normal part of collecting a rental vehicle responsibly.
What is the best way to photograph a rental car?
Use your phone to create a simple visual record before moving the car. Make sure the images identify the vehicle and show both the overall condition and any specific defects.
- Record the license plate. Take a clear image that identifies the vehicle.
- Film a continuous walkaround. Start at the front and move around all four sides without rushing.
- Take wide-angle photos. Capture the front, rear, both sides, and visible roof condition.
- Photograph existing damage closely. Include scratches, dents, chips, damaged wheels, and broken trim.
- Record the dashboard. Photograph the odometer, fuel gauge, and any relevant warning indicators.
- Capture the interior. Document existing marks on seats, doors, the dashboard, and the luggage area.
- Save the evidence. Keep the original files, rental agreement, and condition report together.
If possible, preserve the original timestamps and back up the photos somewhere accessible from your phone. Don’t rely on a single video if a particular scratch is difficult to see.
What should you do when you find unrecorded damage?
Tell the rental agent before driving away. Point out the exact location and ask them to update the condition report or the company’s digital inspection record.
Follow these steps:
- Show the employee the damage and your photographs.
- Ask for the mark to be described clearly in writing.
- Check that the updated record identifies the correct vehicle.
- Request a copy of the amended report or confirmation through the company’s official system.
- Keep your evidence until the rental is closed and any deposit or damage dispute is resolved.
Don’t sign a statement saying the vehicle has no damage if you have already identified unrecorded marks. Ask the employee to correct the record first.
For further guidance, Consumer Affairs Victoria’s car-hire guidance discusses condition reports, damage checks, and keeping evidence when returning a rental vehicle.
What if the rental agent rushes you?
Stay calm, remain polite, and explain that you need a few minutes to document the car properly. You don’t need to argue or justify taking reasonable precautions.
You can say:
“I’d like to finish checking the vehicle and make sure the existing damage is recorded before I accept it. Could you please update the inspection report with me?”
If the employee refuses to record a significant defect, contact the rental company’s customer service team or branch manager before leaving. Use the official contact details on your booking confirmation or company website.
If you feel uncomfortable, stay in a staffed, public area and ask to speak with another employee. You can also request that the company arrange another vehicle.
Section takeaway: Keep both photographic evidence and a written record. If staff won’t resolve an important issue, contact the company before accepting the car.
When Should You Reject a Rental Car?
You should refuse to drive a rental car when a serious safety concern remains unresolved or when you cannot establish that the vehicle is suitable for your journey. Ask the rental company for a replacement or a qualified assessment.
You don’t have to prove exactly what’s wrong. You need to recognize when something deserves professional attention.
Which warning signs mean you should not drive away?
Pay particular attention to problems that could affect control, braking, visibility, or safe operation. These concerns deserve more than a quick explanation at the counter.
- Damaged tires: A bulge, significant cut, visibly flat tire, or severe tread wear.
- Serious glass damage: A crack that obstructs your view or damage that could compromise safe visibility.
- Brake concerns: A warning indicator, obvious malfunction, or an employee’s inability to resolve a braking concern.
- Persistent warning lights: An unexplained warning involving a critical system.
- Steering or handling problems: Unusual resistance, instability, or a concerning result during an authorized test drive.
- Broken essential equipment: Inoperative required lights, faulty seat belts, or another defect that makes the car unsafe or unlawful to use.
- Missing authorization: Unresolved concerns about the required rental documents or your permission to drive the vehicle.
A scratch or small dent does not automatically make a vehicle unsafe. However, it should still be documented before departure.
Should you accept a different car if your first choice has problems?
Yes, a replacement can be a sensible solution when the original vehicle has unresolved issues. The replacement should meet your needs, have acceptable safety conditions, and be documented just as carefully.
Before accepting the alternative, check that:
- The new vehicle matches the updated rental agreement.
- Its license plate and condition report are correct.
- Its controls and transmission suit your driving experience.
- Any price difference or change in insurance terms is explained.
- You have enough time to inspect the replacement before leaving.
If the rental company cannot provide a suitable vehicle, ask about your options under the booking terms. Keep written records of the problem and any proposed solution.
How can you make the first drive safer?
Once you’ve accepted the vehicle, don’t immediately head onto a fast highway or an unfamiliar mountain road if you can avoid it. Give yourself time to get comfortable with the controls.
Before departure:
- Enter your destination into navigation while parked.
- Adjust your seat and mirrors before moving.
- Secure your luggage so it doesn’t obstruct visibility or move around.
- Keep your phone charged and save the rental company’s assistance number.
- Choose a route that allows you to stop safely if you need help.
- Tell a trusted person your intended route and approximate arrival time when appropriate.
For a first solo drive in an unfamiliar country, I would favor a straightforward daytime route over a late-night departure with complicated directions. Confidence grows when you have time to understand the car and the road.
Section takeaway: Never let time pressure override a safety concern. A replacement vehicle or a delayed departure is better than beginning a journey in a car you don’t trust.
Frequently Asked Questions About Inspecting a Rental Car
How long should it take to inspect a rental car?
Allow around 15–20 minutes for a careful inspection, photographs, basic controls, and paperwork. A larger vehicle, poor lighting, existing damage, or an unfamiliar model may require more time. Never skip an important check just because the rental agent is busy.
Should I inspect a rental car if the employee has already checked it?
Yes. The employee’s inspection and your own inspection serve different purposes. Walk around the vehicle yourself, compare visible damage with the condition report, test basic functions, and keep your own photos or video before leaving.
Do I need to photograph every scratch on a rental car?
Photograph every visible scratch or mark that isn’t already documented. Take one image showing where the damage is and another showing the mark clearly. Ask the rental company to record it in writing before you drive away.
Can I refuse a rental car if I find damage?
Yes, you can raise the issue and request a replacement if the damage makes you uncomfortable or raises a safety concern. For cosmetic damage, ask the company to document it accurately. Your cancellation, replacement, or refund options depend on the rental agreement and applicable local law.
What if I discover damage after leaving the rental lot?
Contact the rental company as soon as you safely can. Explain where you found the damage, provide clear photos, and follow the company’s reporting instructions. Avoid waiting until return, because prompt notification creates a clearer record of when you discovered the problem.
Should I inspect the car again when returning it?
Yes. Photograph the vehicle’s exterior, interior, fuel gauge, and odometer at return. When possible, have a rental employee inspect it with you and provide a return confirmation. If you use an after-hours drop-off, follow the company’s instructions and keep your photos and proof of return.
What should I do if a rental car breaks down during a solo trip?
Move to a safe location if possible, switch on the hazard lights when appropriate, and contact the rental company’s roadside assistance service. Follow local emergency procedures if you’re in immediate danger. Don’t arrange repairs independently unless the rental company authorizes them.
Pro tip: Before traveling, check official destination guidance and your rental agreement for local driving rules, emergency contacts, and roadside assistance procedures.
Final Takeaway: Inspect First, Then Drive With Confidence
Knowing how to inspect a rental car helps you protect your safety, avoid preventable disputes, and begin a solo journey with greater confidence. You don’t need expert mechanical knowledge; you need a consistent checklist, clear evidence, and the willingness to ask questions.
Before leaving the rental location, make sure you’ve completed these essential tasks:
- Walked around the entire vehicle and photographed existing damage.
- Checked the tires, windows, lights, mirrors, and seat belts.
- Reviewed the dashboard, fuel level, and odometer.
- Confirmed the rental agreement, insurance terms, and emergency contact details.
- Obtained written confirmation of any unrecorded damage.
- Requested a replacement or professional assessment if you found an unresolved safety concern.
Most importantly, give yourself permission to slow down. Your trip doesn’t need to begin the moment the keys reach your hand.
A few careful checks can help you leave the rental lot better prepared for the road ahead—and more confident about traveling independently.